Ja
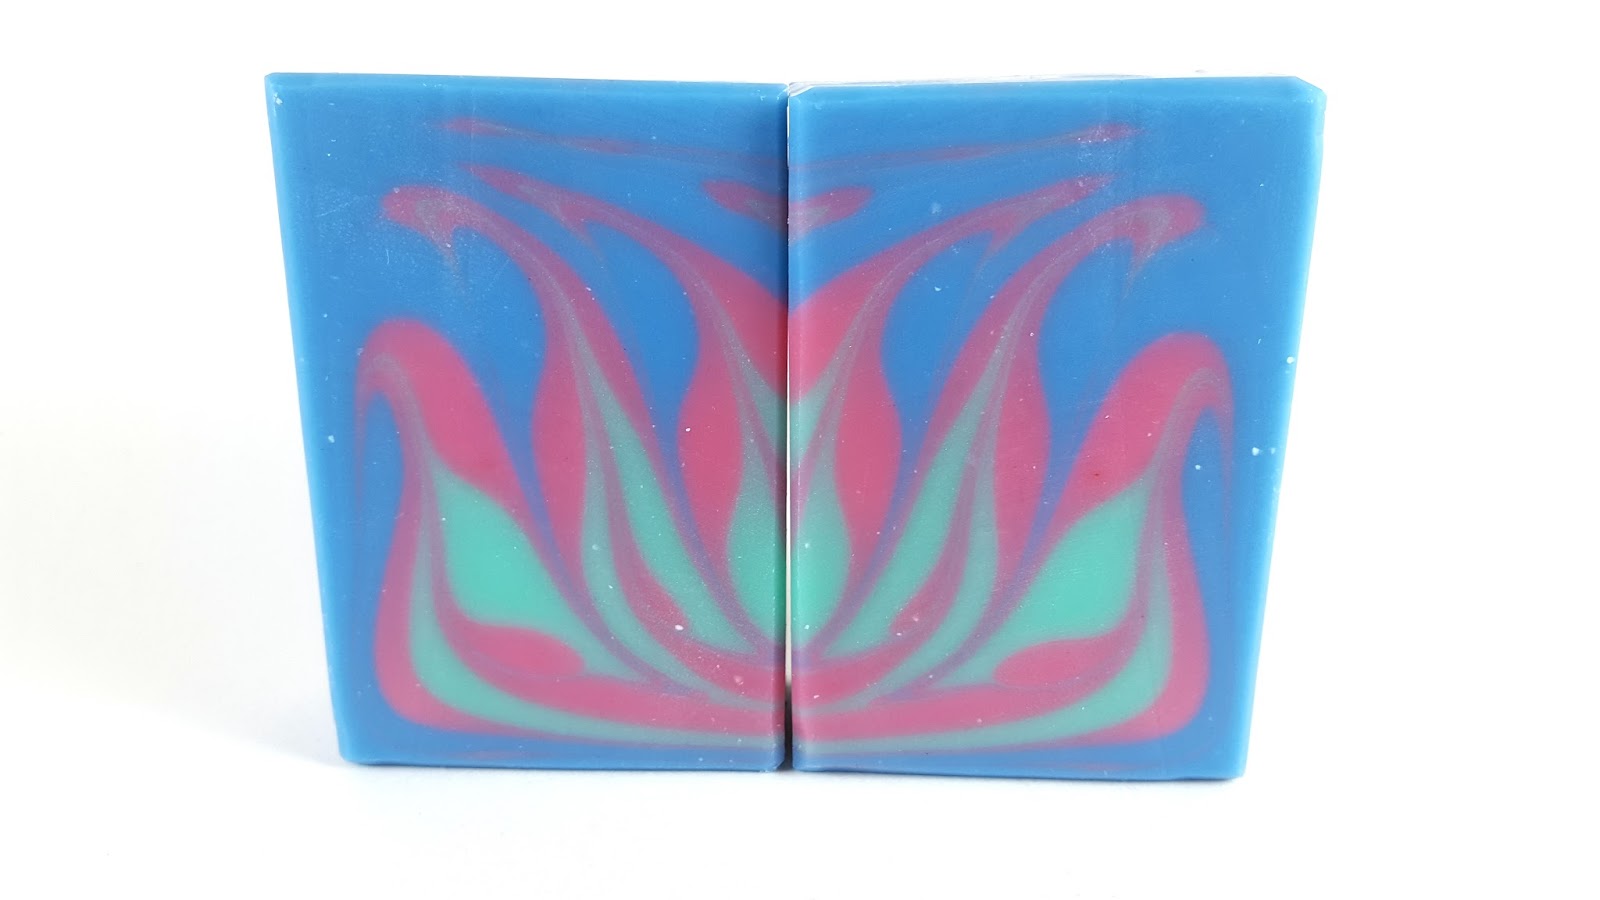
panese Cherry Blossom Rimmed Soap
 |
| Here is my entry: Japanese Cherry Blossom |
It's Soap Challenge Time!! YAY!! March's soap challenge is creating rimmed soaps. Amy Warden hosts the Soap Challenge every month and you can find more information here. This month Tatsiana Serko was kind enough to share her method of creating rimmed soaps. You can find Tatsiana's blog here. She does AMAZING work! I love how vibrant her colors are, and how clean her lines are, and how . . . okay, I think we get the picture. Her soaps are amazing!!
Okay, let's get down to the nitty gritty of it all . . . there are 2 different methods of creating the rim that were presented to us in da club. Amy showed us how to create a single layer rim and Tatsiana showed us how to create a slab of soap and how to slice off the necessary portions for the rim. I chose to create my soap using Tatsiana's method.
Tatsiana's method utilized a slab mold and gelling your soap. I used my custom mold that my husband made for me (such a great guy) that allows me to create, pretty much, whatever sized slab I want up to 12 inches square.
 |
| My beautiful mold!! |
The idea here is to create a slab of soap and then raise the soap up so a little (4 mm) is sticking above the boarder of the mold and use a soap cutter to slice off a thin sheet of soap. The key here was to
make sure your soap gelled so the thin sheets of soap did not crack and break when rolling into a cylindrical shape.
Here is the recipe that I used:
25% Palm Oil
15% Palm Kernel Oil
15% Coconut Oil
35% Avocado Oil
10% Castor Oil
8% Superfat with the water amounting to 30% the weight of the oils
***Make sure to run your recipe through a lye calculator.***
This is pretty much the same recipe that Tatsiana provided, but, I did not have enough sweet almond oil so I subbed in avocado oil. I LOVE me some avocado oil :) :)
So, I blended up my soap batter around 120 degrees Fahrenheit and had plenty of time to mix in my colorants and slap this into the mold with my batter staying very fluid. The rimmed portion of the soap does not contain any fragrances and contained no other additives. I wanted plenty of time to play with my soap batter. When I was finished playing with my design I popped this bad girl (yep, this mold has to be a she) into the oven at 170 degrees Fahrenheit for 2 hours (this sucker juuuuussssst fit in my oven). When the 2 hours were up I turned the oven off and left the mold in the oven for another 4 hours with the light off. When I removed the soap from the oven to unmold it was still warm, but, firm. I did not want this soap to cool off too much because I thought that this would be more pliable while it was still warm.
 |
| My unscented soap slab still a little warm :) |
Using my mold as a guide I propped my soap up so that just the very top of the soap was sticking out of the top and sliced off a thin sheet to get rid of the bumpy top part of the soap slab with my handy dandy cutter (super cheap: piece of guitar string with 2 pulls made from scrap plywood- worked like a charm). Once the top was cut off I sliced the necessary sheets and then cut them to size and finagled them into my 6.5 inch sections of 3 inch in diameter PVC pipe. This took a little trimming and smushing. I used a rolling pin to help form the shape of rim before inserting into the pipe.
My husband insisted on measuring the size of the rim to make sure I was close to 4 mm. I will say, I was pretty close :) The cardboard from my Handmade Beauty Box was the perfect thickness.
 |
| 4.07 mm thickness measured with a caliper |
Once all of the rims were formed in the molds I created the inner soap. For the inner soap I used my standard recipe. I chose to have a solid pink color on the inside of the soap because I used a swirly pattern on the rim and I really wanted the rim to stand out and be the show piece. I did not put this round in the oven to gel, but, I did wrap them with towels to rest overnight. Here are my soaps all unmolded.
 |
| 3 tubes of 3 in diameter and 1 tube of 1 in diameter rimmed soaps |
I had enough batter to fill 2 of the 3 inch in diameter rims to the brim and 1 1 inch in diameter rim to the brim. The last 3 inch in diameter rim was only partially filled.
 |
| Cut 1 inch slices of Japanese Cherry Blossom Soap |
The 1 inch in diameter soaps were super cute, but, way more difficult to form. I used the 4 mm thick soap and had to do a lot of smushing to get these to line up correctly. The seam for these was more dramatic too and needed a little manipulation to get them to close up mostly.
Here are my soaps from various angles.
 |
| Side View |
 |
| 3/4 View |
 |
| Full on View |
 |
| Stacked Soaps View |
I had a lot of scrap left over from trimming the rim, so, I made some cute little flowers to put on top of a soap in the future using a small flower shaped cutter. I also chunked up the random slices that I had to trim off for embedding in soap.
 |
| Pile of cute flowers |
 |
| They were ready for their close up! |
 |
| Chunked up soap bits |
This soap was a lot of fun to make. It took a while to complete this one but I think that it was totally worth it. Thank you Amy Warden for hosting this challenge and pushing all of us to try new techniques!!